Showing posts with label astrophotography. Show all posts

Wednesday, February 07, 2018

The Sword of Orion Region (2018 Attempt)

Obviously a fantastic part of the sky, imaged by many! I really wanted to get a lot of data of this region now that the observatory was up and running. After a few attempts, I realized that my stars were rather oblong during long exposure imaging. Couldn't really figure it out, so I hit the proverbial reset button: realigned the mount, rebalanced the mount with photographic equipment attached, re-installed new guiding software (PHD2), and started from scratch. Immediately saw better results with easier guiding (software could easily pick up guide stars) and could now get nice round stars. Also paid attention to focusing!

Anyway, the image below is a nice result!


Image Details:

  • Imaging Scope: AstroTelescopes 80mm ED Refractor
  • Imaging Camera: Nikon D7000
  • Guiding Scope: William Optics 66mm Petzval Refractor
  • Guiding Camera: Orion Starshoot Autoguider
  • Light Frames: 20*5 minutes @ ISO1250 for the overall region, 20*1 minutes @ ISO1250 for the core
  • Bias Frames: 20
  • Dark Frames: 10
  • Stacked in Deep Sky Stacker
  • Merged in Dynamic Photo-HDR
  • Tweaked in Adobe Lightroom

Friday, December 22, 2017

I Now Have an Observatory! (aka "Going Off the Deep End")

Astronomy has been an on and off hobby for me, but since moving out to rural Texas, it's been more on than off, and that was the intent. We moved northwest of Liberty Hill, where skies are currently around Bortle 3 with the light dome from Austin to the south. One can clearly make out the Milky Way on a moonless night, and my property offers a big sky view with very low horizons all around. I'm sure more folks will settle into the area but believe we've moved far enough out that we'll be ahead of the sprawl for a long time.

Part of the move involved purchasing an observatory. I looked around at various options and studied pros and cons of various designs while also thinking about my own needs and preferences. I originally considered a dome, but of the available options at my price range they were either too expensive or looked too much like port-a-loos (according to my wife/financial officer). I really ultimately preferred a roll-off-roof design because it offered great sky views and more room to walk around and store stuff (again, given my budget). Also, it would look more like a shed than a pure observatory, the latter looking more expensive and perhaps more attractive to would-be thieves.

I explored different options ranging from building it myself to turn-key solutions. I'm not handy at the best of times, so my confidence with respect to the former option was very low. Exploring turn-key solutions, I inquired with several dedicated observatory builders. Most were friendly, but prices shot up quickly when discussing the various options that I needed. I also approached local barn/shed builders. Most declined right off the bat, a few were interested and promised to draw up plans. While waiting for such plans, I got in touch with a few folks from the local astronomy club who had put together an observing site about 1.5 hours west of me called Stellar Skies. It's a great bit of land where folks can pay for a small portion of it, with concrete pad included, and utilize it as they wish (temporary scope setups on weekends to permanent observatory builds with remote access). They have a chap there who builds roll-off roof observatories and who is also a professional framer/builder. After a few email exchanges, he agreed to come out this way and build me a 10'*12' roll-off roof within my budget! Great guy, this Jarret character - he owns a massive Dob and has earned various Astronomy League certificates for visual observing. He well-and-truly understood the intricacies of building observatories and asked all the right questions while putting it all together. (While he was building my observatory, he launched a formal company which can be seen here - Heaven's View Observatories: https://hvobservatories.squarespace.com/.)

So, it took Jarret about a month or so put the observatory together. He had other jobs and rain interfered with the construction site access (when it rains on my property it becomes a massive mud fest!). But, he got it done and it was complete by Thanksgiving weekend. The beauty of his design is that he uses steel beams for the roof rail supports, with a cross-beam welded support system. This means no warping over the years as might be experienced with wooden rail support systems. Once he was done, I painted the exterior and interior. I also built a corner desk unit and added some cheap but strong plastic shelving from Lowes hardware store. The floor isn't done yet, and I'm exploring options for that but leaning towards some matt black horse stall padding available at my local Tractor Suplly Company (yeehaw!). I'll also add a solar power system to keep my marine battery charged, which powers both my scope and laptop during imaging.

It really is a luxury in this hobby to have your own observatory. To be able to walk out and be imaging without barely any setup time is amazing and great fun. My mount, the Celestron CGEM, has a hibernate mode, so you can effectively turn it off and on later and the mount will still be perfectly polar aligned. So, you really do have a ton of time to really focus on the image, including obtaining your dark, flat and bias frames.

Anyway, finished product pictures are below, and you can see construction images on my FLICKR site here.


Sunday, March 05, 2017

Catching up - Moon, Venus & Eclipse

Okay, time to get the blog up to date! I'm not even sure if anyone comes here any more but I'll keep it going all the same.

Over the last couple of months, I have been testing out my new C8 OTA and New ZWO ASI120MC Camera combination. The skies here have been so-so, so I've been getting out when I can.

First, here's a pic of the camera on my C8 and CGEM configuration:


I'm using FireCapture freeware software to capture my video files from the camera. I like it a lot. It has different recommended settings based on the object you're shooting, and you can modify those settings as needed. Super-easy.

Here is a wide-field~ish shot of the moon:


...and a nice zoomed-in shot (i.e. camera + 2x barlow) of Copernicus:


I've tried imaging Venus, but getting some chromatic aberration, most likely due to a cheap barlow:


So, overall, not too shabby. Jupiter is rising earlier and earlier, so I'm looking forward to trying out the new gear on that marvelous gas giant. Until then...


Sunday, January 08, 2017

Rediscovering Planetary and Lunar

Last year was a bit of a bust. Between the weather, work and family, there weren't too many opportunities to get out under the night skies for me. Part of that involves driving further and further out of Austin, Texas, to escape the growing city lights. After some thought, I decided to plunge back into lunar and planetary astrophotography. You don't need dark skies for this, so I don't have to drive too far to image the moon and planets. My front garden would do just fine.

In that vein, I updated some astronomy equipment. Firstly, I acquired a C8 Celestron OTA second-hand. Came with a finder scope and terrific carrying case. This gives me a dedicated scope for lunar and planetary, and will later allow me to shoot more distant DSOs once I can attach my guiding setup to the scope.


Then, I was able to get a new lunar and planetary imager for Christmas. It's a ZWO ASI120MC camera, quite a step-up from the Philips Toucam I used all those years ago. You can see the full specs here, but the camera can also be used as an autoguider. Hmm. Image acquisition seems rather straightforward, using it with the FireCapture software which I like a lot (freeware!). It has different profiles for different planets and the moon built-in, so takes a lot of guesswork out of the various settings you need to make out in the field.


So, hopefully this new stuff will encourage me to get out more and take photos. Visually, the C8 is great. I needed to collimate it just a little to get it in shooting condition. It's offered great views of various objects so far, and I'm sure it will fir the astrophotography bill! The OTA is FASTAR compatible, so I'll check that out at some stage...

Wednesday, February 10, 2016

Astro Update!


Well, we finally got some clear skies over the past week, and I have been able to get out and observe. The conditions have been great, with a little wind that has added to the chill factor during these so-called winter months (temps have been a lot higher than normal this year). It had been a while since I have actually imaged, so I got out under the stars a couple of times and revisited some old friends.

Below are a couple of shots of the Sword of Orion region, with different processing workflows applied to each. I'm not sure which one I like better, and wish I could blend the two from a color perspective. My new Orion field flattener made a huge difference, though - nice round stars to the edge of the field.


Image Details:

  • Imaging Scope: Astrotelescopes 80mm ED Refractor
  • Imaging Camera: Nikon D7000
  • Guide Scope: William Optics 66mm Petzval Refractor
  • Guide Camera: Orion Starshoot Auto Guider
  • Mount: Celestron CGEM
  • Orion Field Flattener
  • 10*5 minute lights
  • 10*1 minute lights
  • 10*5 minute darks
  • 40 bias frames
  • Stacked in Deep Sky Stacker
  • Processed in GIMP

Below is the M47 cluster in Canis Major. I would like for my cluster images to have more "punch" - they lack impact somehow. Pretty sure its an exposure issue.


Image Details:
  • Imaging Scope: Astrotelescopes 80mm ED Refractor
  • Imaging Camera: Nikon D7000
  • Guide Scope: William Optics 66mm Petzval Refractor
  • Guide Camera: Orion Starshoot Auto Guider
  • Mount: Celestron CGEM
  • Orion Field Flattener
  • 10*1 minute lights
  • 10*5 minute darks
  • 40 bias frames
  • Stacked in Deep Sky Stacker
  • Processed in GIMP
More to come soon!

Monday, December 14, 2015

Geminids 2015

Ah, the Geminds. Lovely to watch, difficult to capture! This time of year, the weather makes for bad dew conditions, so having a couple of cameras pointing up at the night sky in the cold, late hours makes for difficult capturing attempts. Still, I managed to get the image below of a Geminid zooming near the Orion constellation and Pleiades with my 10-20mm Sigma lens, set at 10mm. ISO3200, 35" exposure.


Tuesday, December 03, 2013

Forest Trails of a Different Kind!


Taken in rural, northwest Arkansas, United States.

This is about two hours of star trails, composed of individual 30 second images. You can see a gap in the trails where I quickly had to correct a setting. The forest trees were light painted with a regular white LED flashlight for the first five minutes' worth of frames. 

Other than stacking the individual frames, this is all straight from camera with no additional tweaking.

Nikon D7000 and a Rokinnon 8mm fisheye.

Sunday, November 20, 2011

Tips & Tricks for Basic Astrophotography

Hi Folks,

I often get asked about how start out shooting stars with basic equipment, like the modern DLSR camera body and an 18-55mm stock lens. I get asked either through FLICKR or via my blog site. I thought I'd post my basic response below. If anyone has any amendments or recommendations, I'd love to hear them!

Here is what I recommend to start off with – photos of various star regions and star trail shots. Both are pretty easily attainable and can get quick results with a little bit of care and patience. Admittedly, a lot of this is written with the Nikon D7000 camera in mind, which is what I use. Many modern DLSRs should have comparable features, though.

First, though, some general pointers!
  • Make sure you have a decent tripod. The D7000 is somewhat heavy, so you want to be sure you have a tripod that can support it safely for long periods of time and be able to position the camera smoothly and easily without moving out of position later on. Just make sure that you can support your camera safely for long periods of time without the chance of slow slippage out of position. 
  • Get an infrared remote control. If you don’t already have one, you can get one off eBay for pretty cheap (Grey market units for US$5.00! for Nikon and Canon compatible remotes)
  • Get familiar with the stars. To know where to shoot, you need to have a good understanding of the stars. You can use a basic planisphere available at many bookstores. Or you can download some free star map software (try Stellarium, it’s excellent!). If you have a smart phone like an Android or iPhone, there are some star map applications that you can use, too. If you know where interesting things are in the sky, you can aim your camera at them and try to capture them.
  • Focusing. The D7000’s Live View mode is excellent for shooting stars. Many other DLSR camera models have this feature. Use manual focus mode, it gives you more control and you won't be cursing at the camera when it doesn't focus by itself. When you have set up your shot, turn on live view mode and zoom in as far as possible (on the camera, using the + button). Then focus the camera until the star is sharp. Turn off live view and proceed with shooting. If there are no bright stars in the area, find a bright star close to that area and use it, then point the camera back to where you want to shoot without knocking the lens out of focus.
  • Comfort. When shooting, be sure you’re comfortable. It’s hard to concentrate when you’re too warm or too cold, hungry, thirsty etc. so prepare accordingly.
  • Light Pollution. Try and get far away from city lights if it’s safe to do so. Pick out a spot that you’re familiar with or have access to before you go and shoot so that you’re not driving around in the dark getting lost instead of taking pictures! Or, try and find a SAFE spot that has you shooting at your desired target away from city light domes.
  • Charge Batteries! Nothing worse than starting to shoot when your batteries die. Batteries may die faster in colder weather! Make sure they’re fully charged before you head out.
  • Safety. I always stress this. Shoot somewhere safe. Tell someone where you'll be, or take someone along. Check in periodically if you're out for long periods of time.
Hopefully this makes sense. Some of it sounds basic but people can underestimate what it requires to shoot the stars. Now onto setting up and taking shots…

A. Star Regions.

Your set up should enable you to capture some cool shots of various star regions. One very good place to shoot is the center of our Milky Way galaxy. This is located in the Sagittarius region, which is just next to the tail of Scorpio. There is a lot of stellar dust, star clusters and smaller nebulas here which can show up nicely if the shot is done well.
To take this shot: 
  1. Set up camera at 18mm
  2. Set camera to Manual focus mode
  3. Set your focus. Turn on Live View, aim camera at a nearby bright star (try Antares, the red-colored star in Scorpius because it's nice and bright). When Antares is in view and centered on the live display, zoom in as far as you can go. Focus until the star is as sharp as possible.
  4. Now, aim towards the center of the galaxy. This is located just next to the tail of Scorpius or right at the Sagitarrius region. (use your planisphere or free software to confirm!) Make sure the camera is locked into position and your shot is nicely framed.
  5. Set camera to RAW shooting mode (to get more color and data)
  6. Set aperture to F4
  7. Set Exposure to 800 ISO, or 1600 ISO if you’re in really dark skies
  8. Set shutter speed to 30 seconds.
  9. Take a shot
  10. Review the shot. Look good? Got stars? Any color? Too bright? Make adjustments to ISO and aperture and keep shooting until you get the shot you want. It's nice to get some star color and some hints of Milky Way dust lanes in there.
  11. Feel free to take several shots of the same region so that you can stack them later to have a relatively noise-free image (see bottom of this write-up!)
Here's an example of the Southern Cross region taken in Australia in mid-2011 (just 20*20 second exposures):


Use this method for any region in the sky. Experiment! There are some neat regions up there and you can try capturing entire constellations at a time.

B. Star Trails.

These shots are cool but take a while! You’re capturing the apparent movement of stars across the sky as the Earth spins on its axis. We’re going to cheat a bit here and use software to help with the shot.
  1. Set the camera up at 18mm
  2. Aim towards desired section of the sky. Try the south or north polar regions (depending on your location) so that you can capture some nice tight circles. You can also try composing the shot so that you can make it more interesting. For example, try and shoot with a big old tree or old building in the foreground.
  3. Focus using live view. For star trail shots, some things being slightly out of focus gives you thicker star trails which can be more pleasing to view.
  4. Set ISO to 400 for initial test.
  5. Set aperture to lowest possible value, say F4
  6. Set shutter speed to BULB
  7. Take a two minute test shot.
  8. Review the shot. Look good? Shot composed okay? Too dark? Too light? Make adjustments, take test shots until satisfied.
  9. When you have set up your shot, now go ahead and take about 1.5 hrs worth of two-minute exposures. Make sure that there is not a time gap between taking the exposures. Take one right after the other. 1.5 hrs is a good starting point.
  10. Then, go home and download some free software called “Startrails.exe”. This software will put all of your two-minute exposures together into a final photo, which should show the full 1.5 hours of star trails you would have captured!! You'll need to copy your two-minutes exposures into a special folder or directory on your PC, and point the Startrails software to that folder/directory. The software will collate and stack all of the images and create a final star trails shot!
Here's an example of some star trails that I took in central Texas last year (about 1.5 hrs of two-minute exposures):


Processing the images also takes some time. For the star regions shots where you have taken multiple exposures of the same region (in order to minimize noise in your shot) you must stack the individual shots into a final clean image. Download Deep Sky Stacker for free and point the software towards a directory or folder with your star region RAW shots, then let it stack the images to create a final image. With the star trail shots, you're using the aforementioned Startrails software to compile the image for you. You can make any star image look better with a bit of tweaking. You can use either Photoshop ($$$) or GIMP (free). I use GIMP. Things you can adjust to get better colors and appearance are: Levels, Curves, Saturation, Sharpening. Try it out!

Thursday, December 02, 2010

Nikon D7000 for Astrophotography

Folks familiar with trying to use Nikon DSLRs are probably aware of the so-called "Star Eater" effect that afflicts the cameras. This is where Nikon applies a form of median filtering against its RAW files, which has a tendency to remove finer details in astro images. Personally, I couldn't detect this in my Nikon D40 but maybe that's just me. The trick that "Nikonians" would use to get around this was the so-called "Mode 3" trick: take the image, then when the camera starts its noise reduction routine, you turn the camera off and it saves a pure RAW file.

Anyway, some analysis has been done on the Nikon D7000, and it looks great. Check this post on the DPREVIEW.COM forums which shows a comparison between the D7000's image processing algorithm and the algorithm used in other Nikon models prior to the D7000. It shows that the 'star eater" phenomenon is no longer an issue! The simulated star in the image remains intact, whereas in the previous algorithm sample image it does not. This bodes very well for those folks interested in using this camera for astrophotography. I am already very impressed with the quality of the astronomical images I have taken using this camera, and now have a little extra confidence that I am not losing any real detail.

To see what I have been able to achieve using the D7000, look here.

Monday, October 18, 2010

New Camera on the Way! Nikon D7000

For quite some time I have been contemplating a new DSLR. I love my D40 - a LOT! It has been a great camera. Lightweight, fairly versatile for an entry-level DSLR, and overall, it has taken phenomenal photographs. It wasn't really designed for astrophotography, I just decided to try it on for size. I can't afford a dedicated CCD imager so I have to settle for dual-use technologies instead. The D40 has done just fine. Yes, it's noisy but there have been ways to work around that.

Anyway, I had been examining either the D90 or D300s. Not for astrophotography but for more serious uses that I won't go into here. Then, Nikon announces a new camera - the D7000. The camera's price is right in between the two models I was considering, and has amazing capabilities. 16.9 megapixels, auto-bracketing, live view, artificial horizon, two SD card slots, more advanced focusing mechanism, HD video etc. All the details can be found here. All good stuff and I couldn't resist it.

From an astrophotography perspective, I am not sure if it will be an improvement over the D40. I say this because, perhaps, I just want to keep my expectation levels low. However, it boasts 16.9 megapixels (excellent for cropping on wide field shots), claims a much better noise handling system at higher ISOs, and the Live View will certainly assist with focusing. It also has a built-in self-timer which could also come in handy. Again, I don't want to get too excited about this camera from an astro viewpoint, but will definitely be trying it out when it gets here from the store.

On the noise handling improvements, check out this website with some examples. Again, I don't want to get too excited but the apparent lack of noise at high ISOs in these examples is rather staggering.

Stay tuned!

Update: See what I have been able to achieve with the D7000 here.

Monday, October 04, 2010

Sword of Orion - HDR

Instead of working on a research paper last night, I was going through some old astronomy images and tried running them through some HDR software that I have (Dynamic-Photo HDR, about US$50). I had seen some folks use HDR software to help bring their astronomy photos to life so was curious about whether or not it really worked. I have been experimenting with HDR and regular photography for a while now, and you can see some nifty examples here, here and here. Without much tweaking, some images looked pretty useless, where the color was horribly over-saturated. I found an image of the Sword of Orion region which I took as a test shot for my new scope back in February of this year. After running it through the HDR software, it came out fairly decently! More detail could be seen around the outer "rim" of the Orion Nebula itself, and the Running Man Nebula really came to life.


It's possible, I suppose, that you could take a serious of shots at different exposure times, say a set of 10 minute exposures, a set of 5 minute exposures and a set of 1 minute exposures, and merge them using HDR software. Looks like others use this technique with terrific success.


Monday, February 23, 2009

Comet Lulin, Take Two ...and Reprocessed!

I learned a new trick about gradient removal. The original Lulin image below shows a light gradient on the right-hand side. This is probably being caused by light pollution. It's actually been an annoying factor for me with most of my astrophotos.


Anyway, I just read an interesting guide on how to remove this using Photoshop. I replicated the tasks in GIMP and got a pretty good result. It diminishes a bit of the tail, but the space background is more uniformly dark and therefore makes for a nicer image in my opinion.

Basic steps:
1. Get your basic image (already stacked and processed)
2. Save it a filename of something like [object name]_rawfile.XXX (whatever format you want)
3. Then go to Gaussian Blur in GIMP or whatever software you use.
4. Blur the image until it is really blurry. You won't see any stars, won't see actual object detail but maybe just a hint of it. Like below:


5. Save that image with a filename of something like [object name]_blurred.XXX
6. Load the two images now as layers
7. Set the layering tool to SUBTRACT so that you are subtracting the difference from one layer to another (sort of a reverse combine layer)
8. Mess with it until you get a nice uniform background without losing too much object detail.
9. Voila!!!!

Final image below:

Thursday, November 06, 2008

A Colorful Moon

In one of the Yahoo! groups that I am a member of, someone posted a shot of the moon but it was a lovely, colorful image. He had tweaked the saturation of the image using Photoshop. I have also seen this on well known astrophotographer Russell Croman's website. Such color saturation apparently works to highlight the different regions of the moon.

So, I went back and found my nice moon image from last year, taken through my 6" dob with a handheld digital camera (flukey!!!). Below is the result. Not quite as nice as Croman's, but an aesthetically pleasing image nonetheless.


Sunday, November 02, 2008

M42 - First Attempt

Below is the second image that I took last night. To be honest, it may be one of my best astrophotos ever - I am quite chuffed with it!

Obviously, it's the Great Orion Nebula, M42. It is my first attempt at capturing this wonderful object. I took this as it sat at about 30-35 degrees high in the sky, which isn't exactly optimal. Still, it came out with nice color and detail.

Image Specs:
  • Nikon D40 DSLR
  • Meade LX200 F6.3 on Milburn Wedge
  • 20*30 second exposures (10 mins)
  • 6*2 second flat frames
  • 3*20 second dark frames
  • ISO800
  • Stacked in DSS
  • Mild sharpening in Photoshop
  • Noise reduction in Neat Image
Initial processed image below without color modification:


Image with modified CYAN color adjustment to reveal more red nebulosity:


Image in Black and White (sort of interesting!):

Monday, October 27, 2008

Lights, Darks, Flats - Oh My!!!!


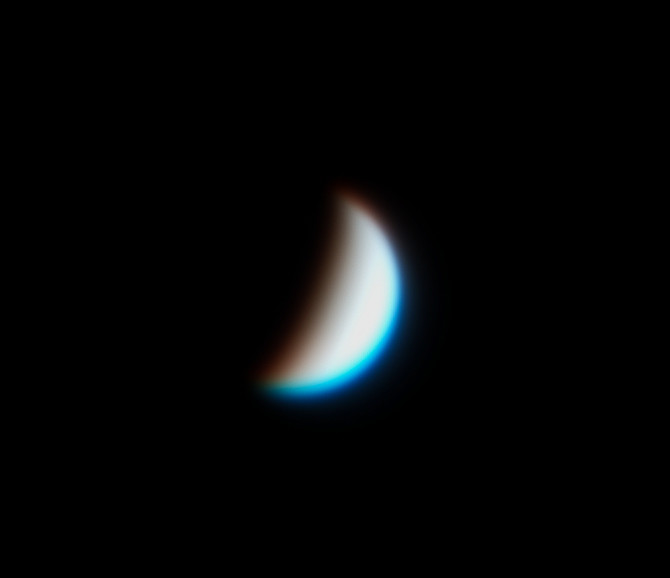
...well, maybe not quite like Hubble! But since my failed attempt at M31, I have been doing some research on how to best take images using the new configuration I have been playing with (200mm zoom Nikon D40 DSLR piggybacked atop an equatorially mounted LX200). The amount of information out on the web for astrophotographers is simply amazing, but the problem is each and every time you look into something you realize just how tricky this particular field of astronomy can be!

Here's what I have learned thus far!

When taking an image of a deep sky object, while it can be tempting and fun (at the time, until you get it home and see that it really looks like cr@p) to just point and shoot, you need to really concentrate, be patient and take a series of different types of images which will be combined once you get home to create the final image using stacking software. It's my understanding that this should be applied regardless of configuration, be it wide field on a static tripod, wide field piggybacked on an equatorially mounted scope, or when connected to an actual scope.

These different types of images are as follows:

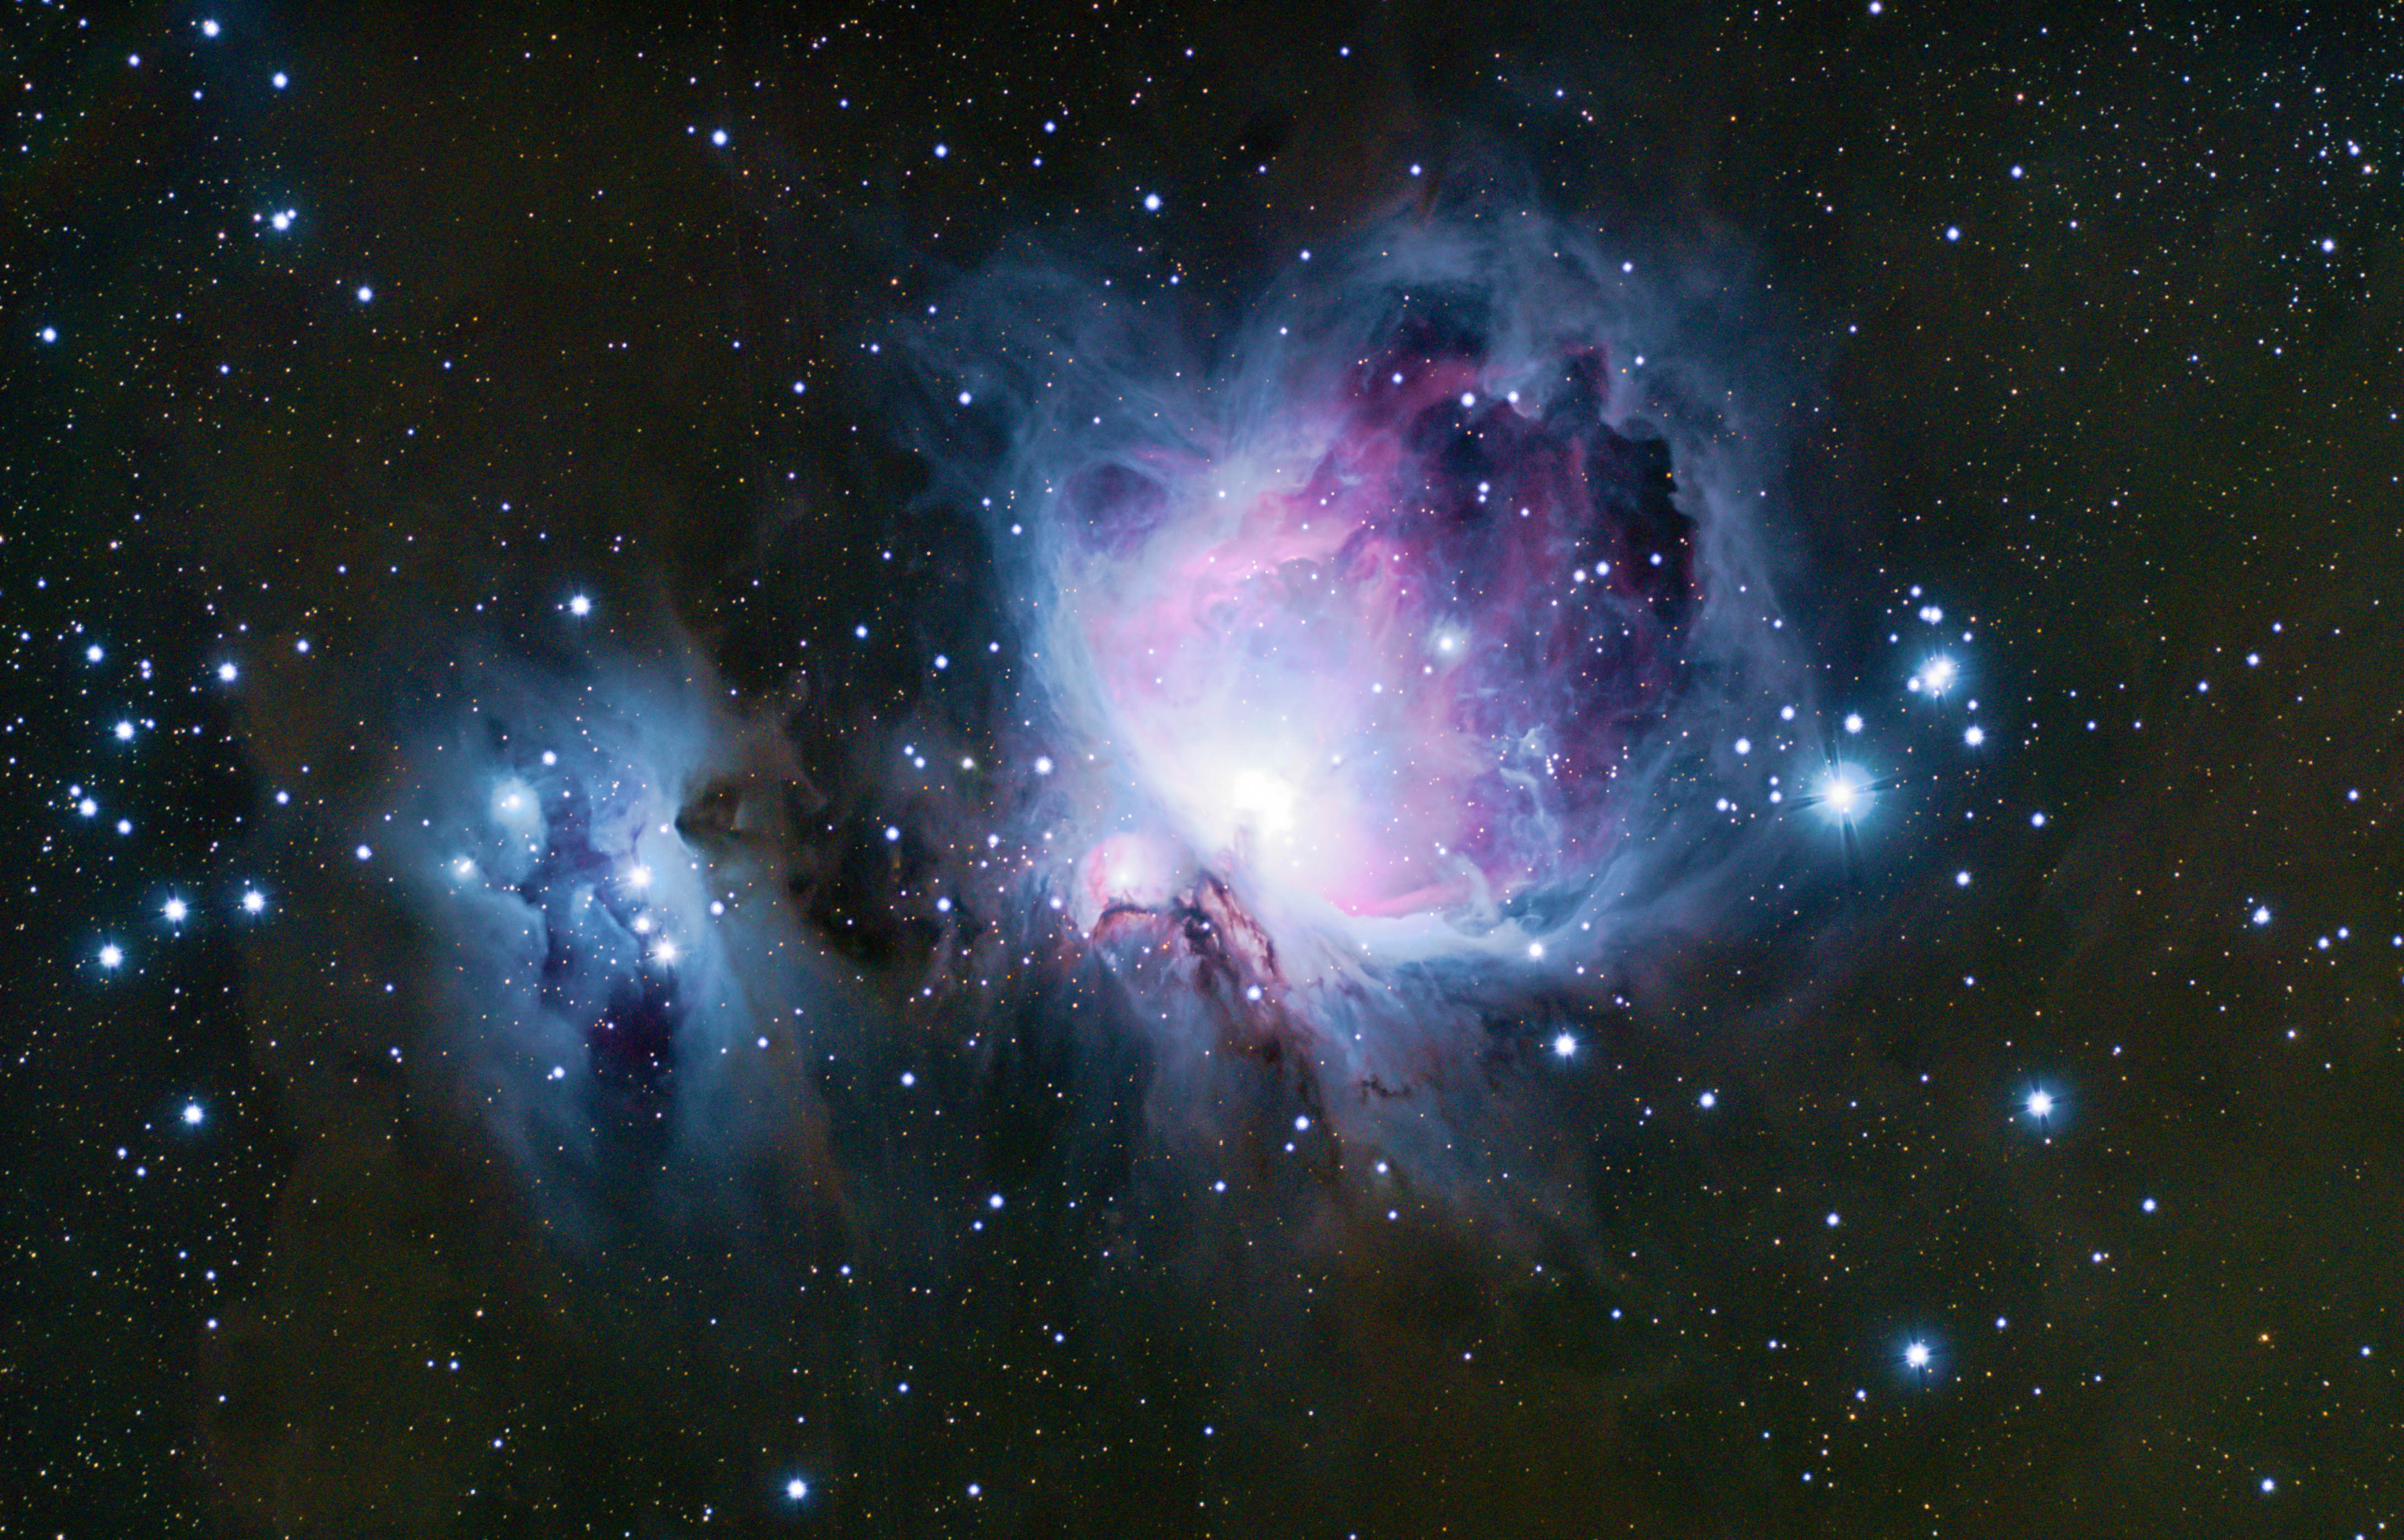
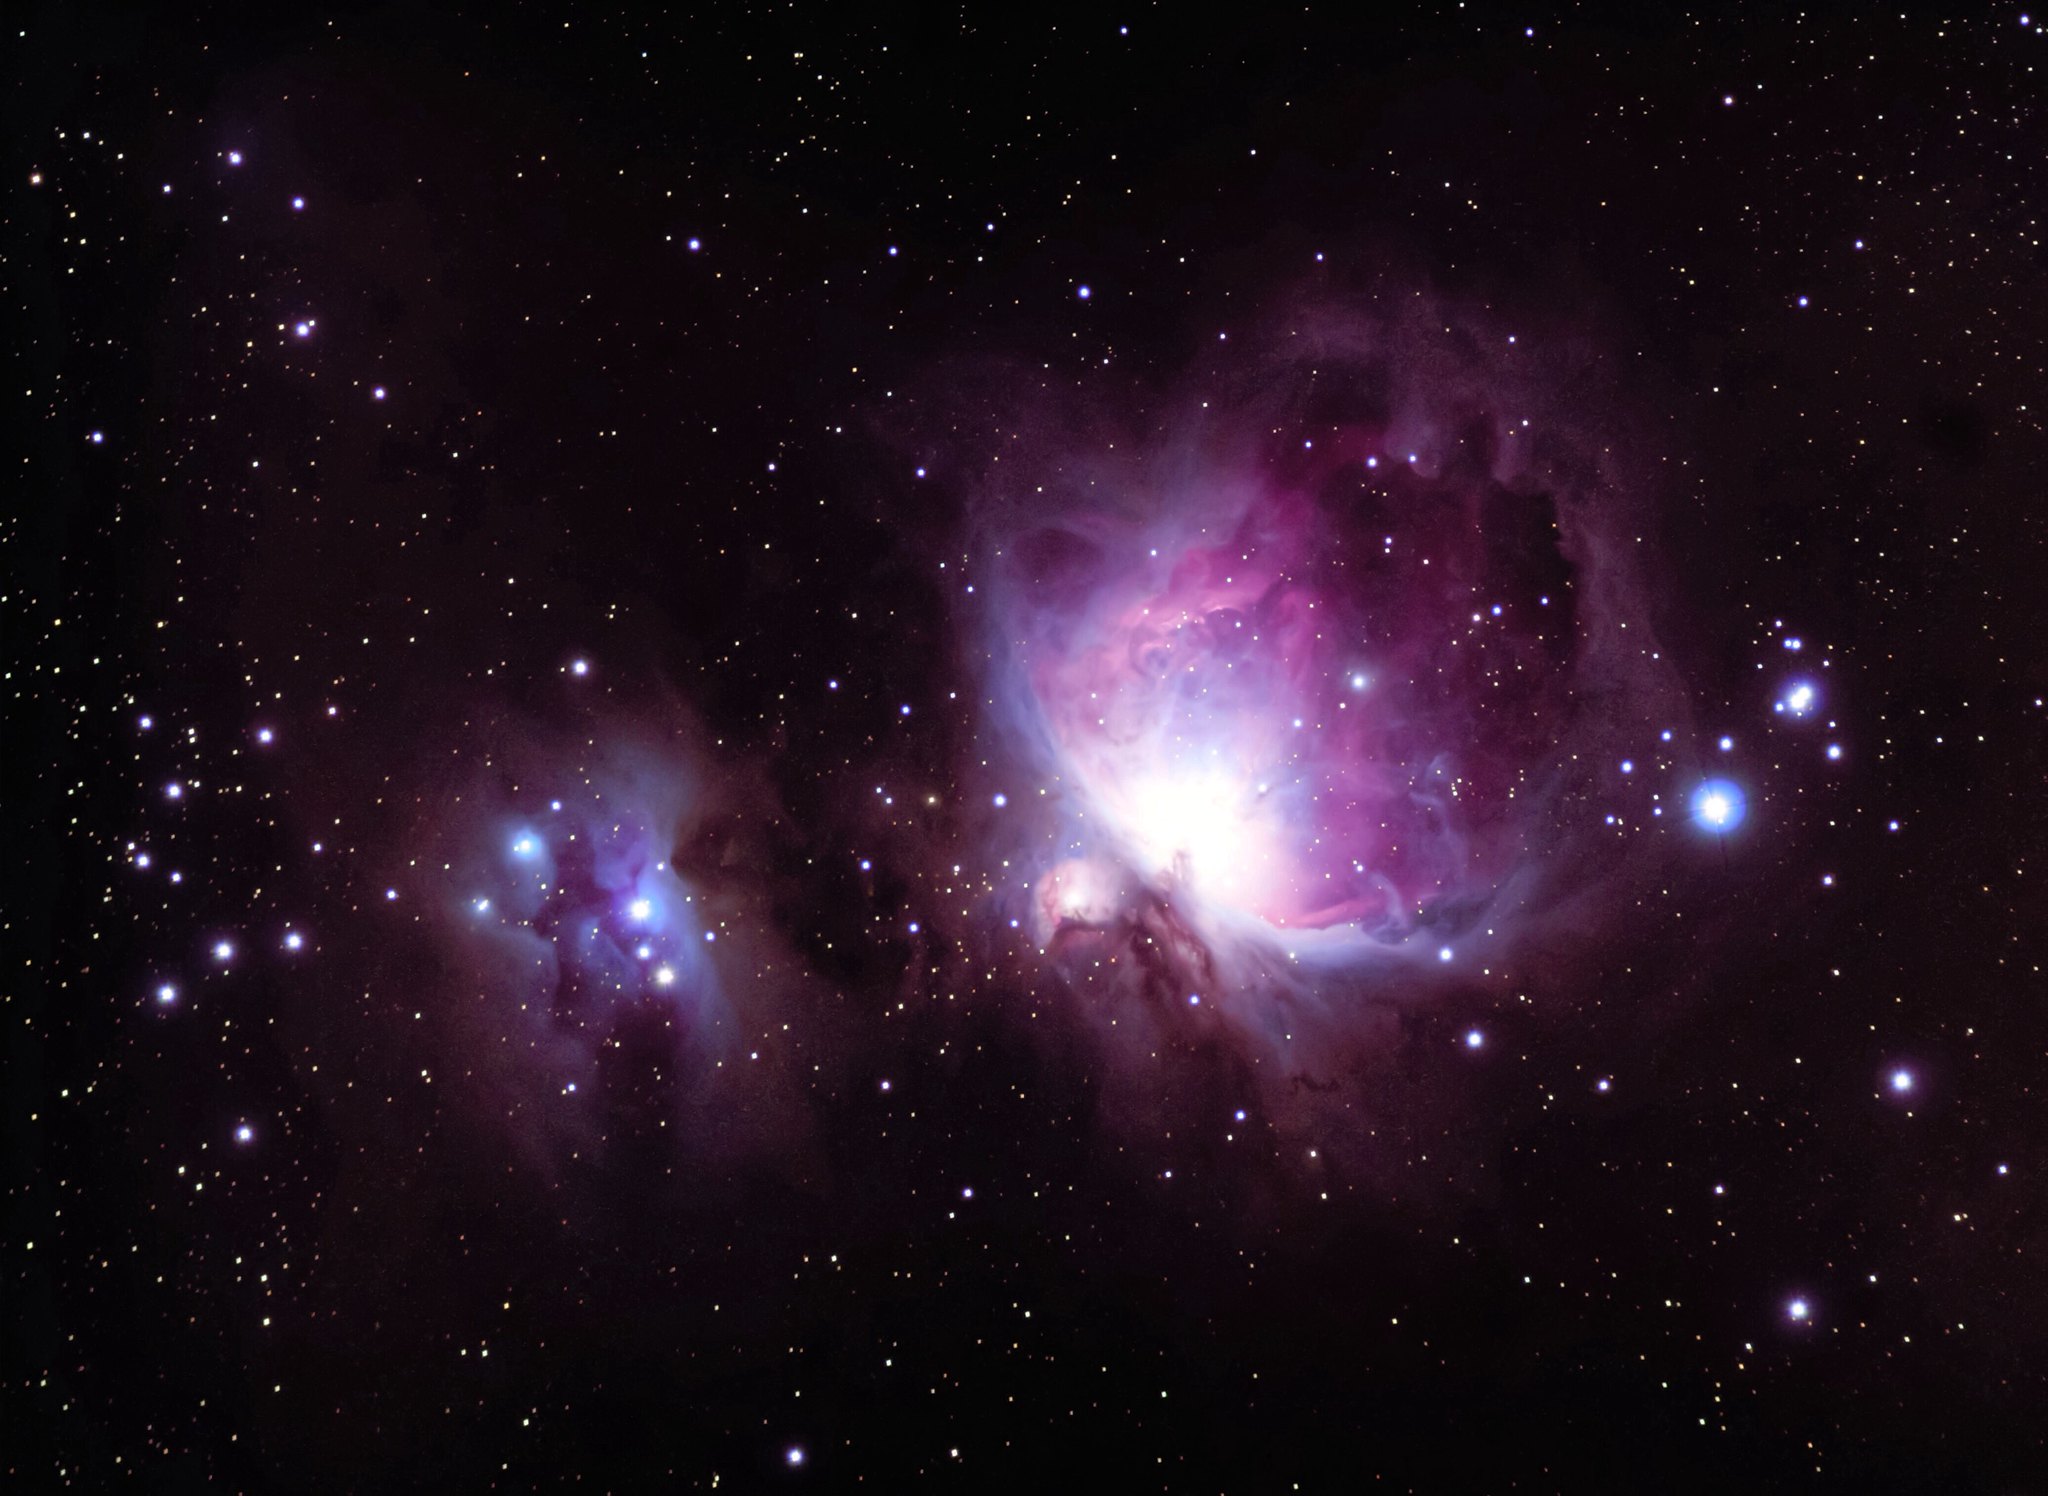
"Light Frames" or "Lights": These are the images/exposures you take of the actual object. You are using each exposure to capture all of those incy-wincy little light photons that have travelled across the vast depths of space and onto your CCD chip. All sorts of settings are available at the ISO, shutter speed/exposure or f-ratio levels. You need to experiment to see which works based based on your configuration, and how many exposures you need to stack.

Example:


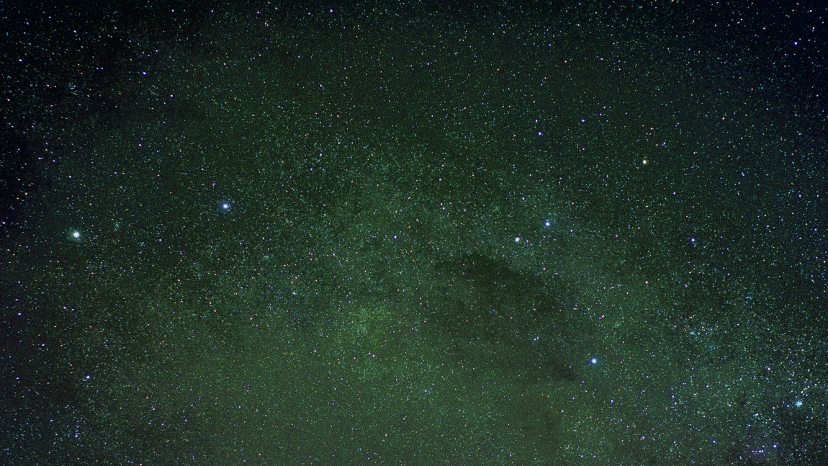
"Dark Frames" or "Darks": These are taken by putting your lens cap onto your zoom lens (if going widefield) or telescope (when shooting tighter objects). You shoot as many as possible at the same temperature and same camera settings (ISO and exposure duration) you used when taking the light frames, so you want to take these almost immediately before or after you shoot the actual object itself. When you combine these Darks in processing software like DSS, Registax or MAXIMDL, you create a "Master Dark" file which is essentially a kind of map of pixels and camera noise. The processing software then uses this Master Dark frame to subtract any noise within the final, stacked image. When taking these, it's useful to label them on the camera itself so you don't get them mixed up with the actual light frames.

Example:


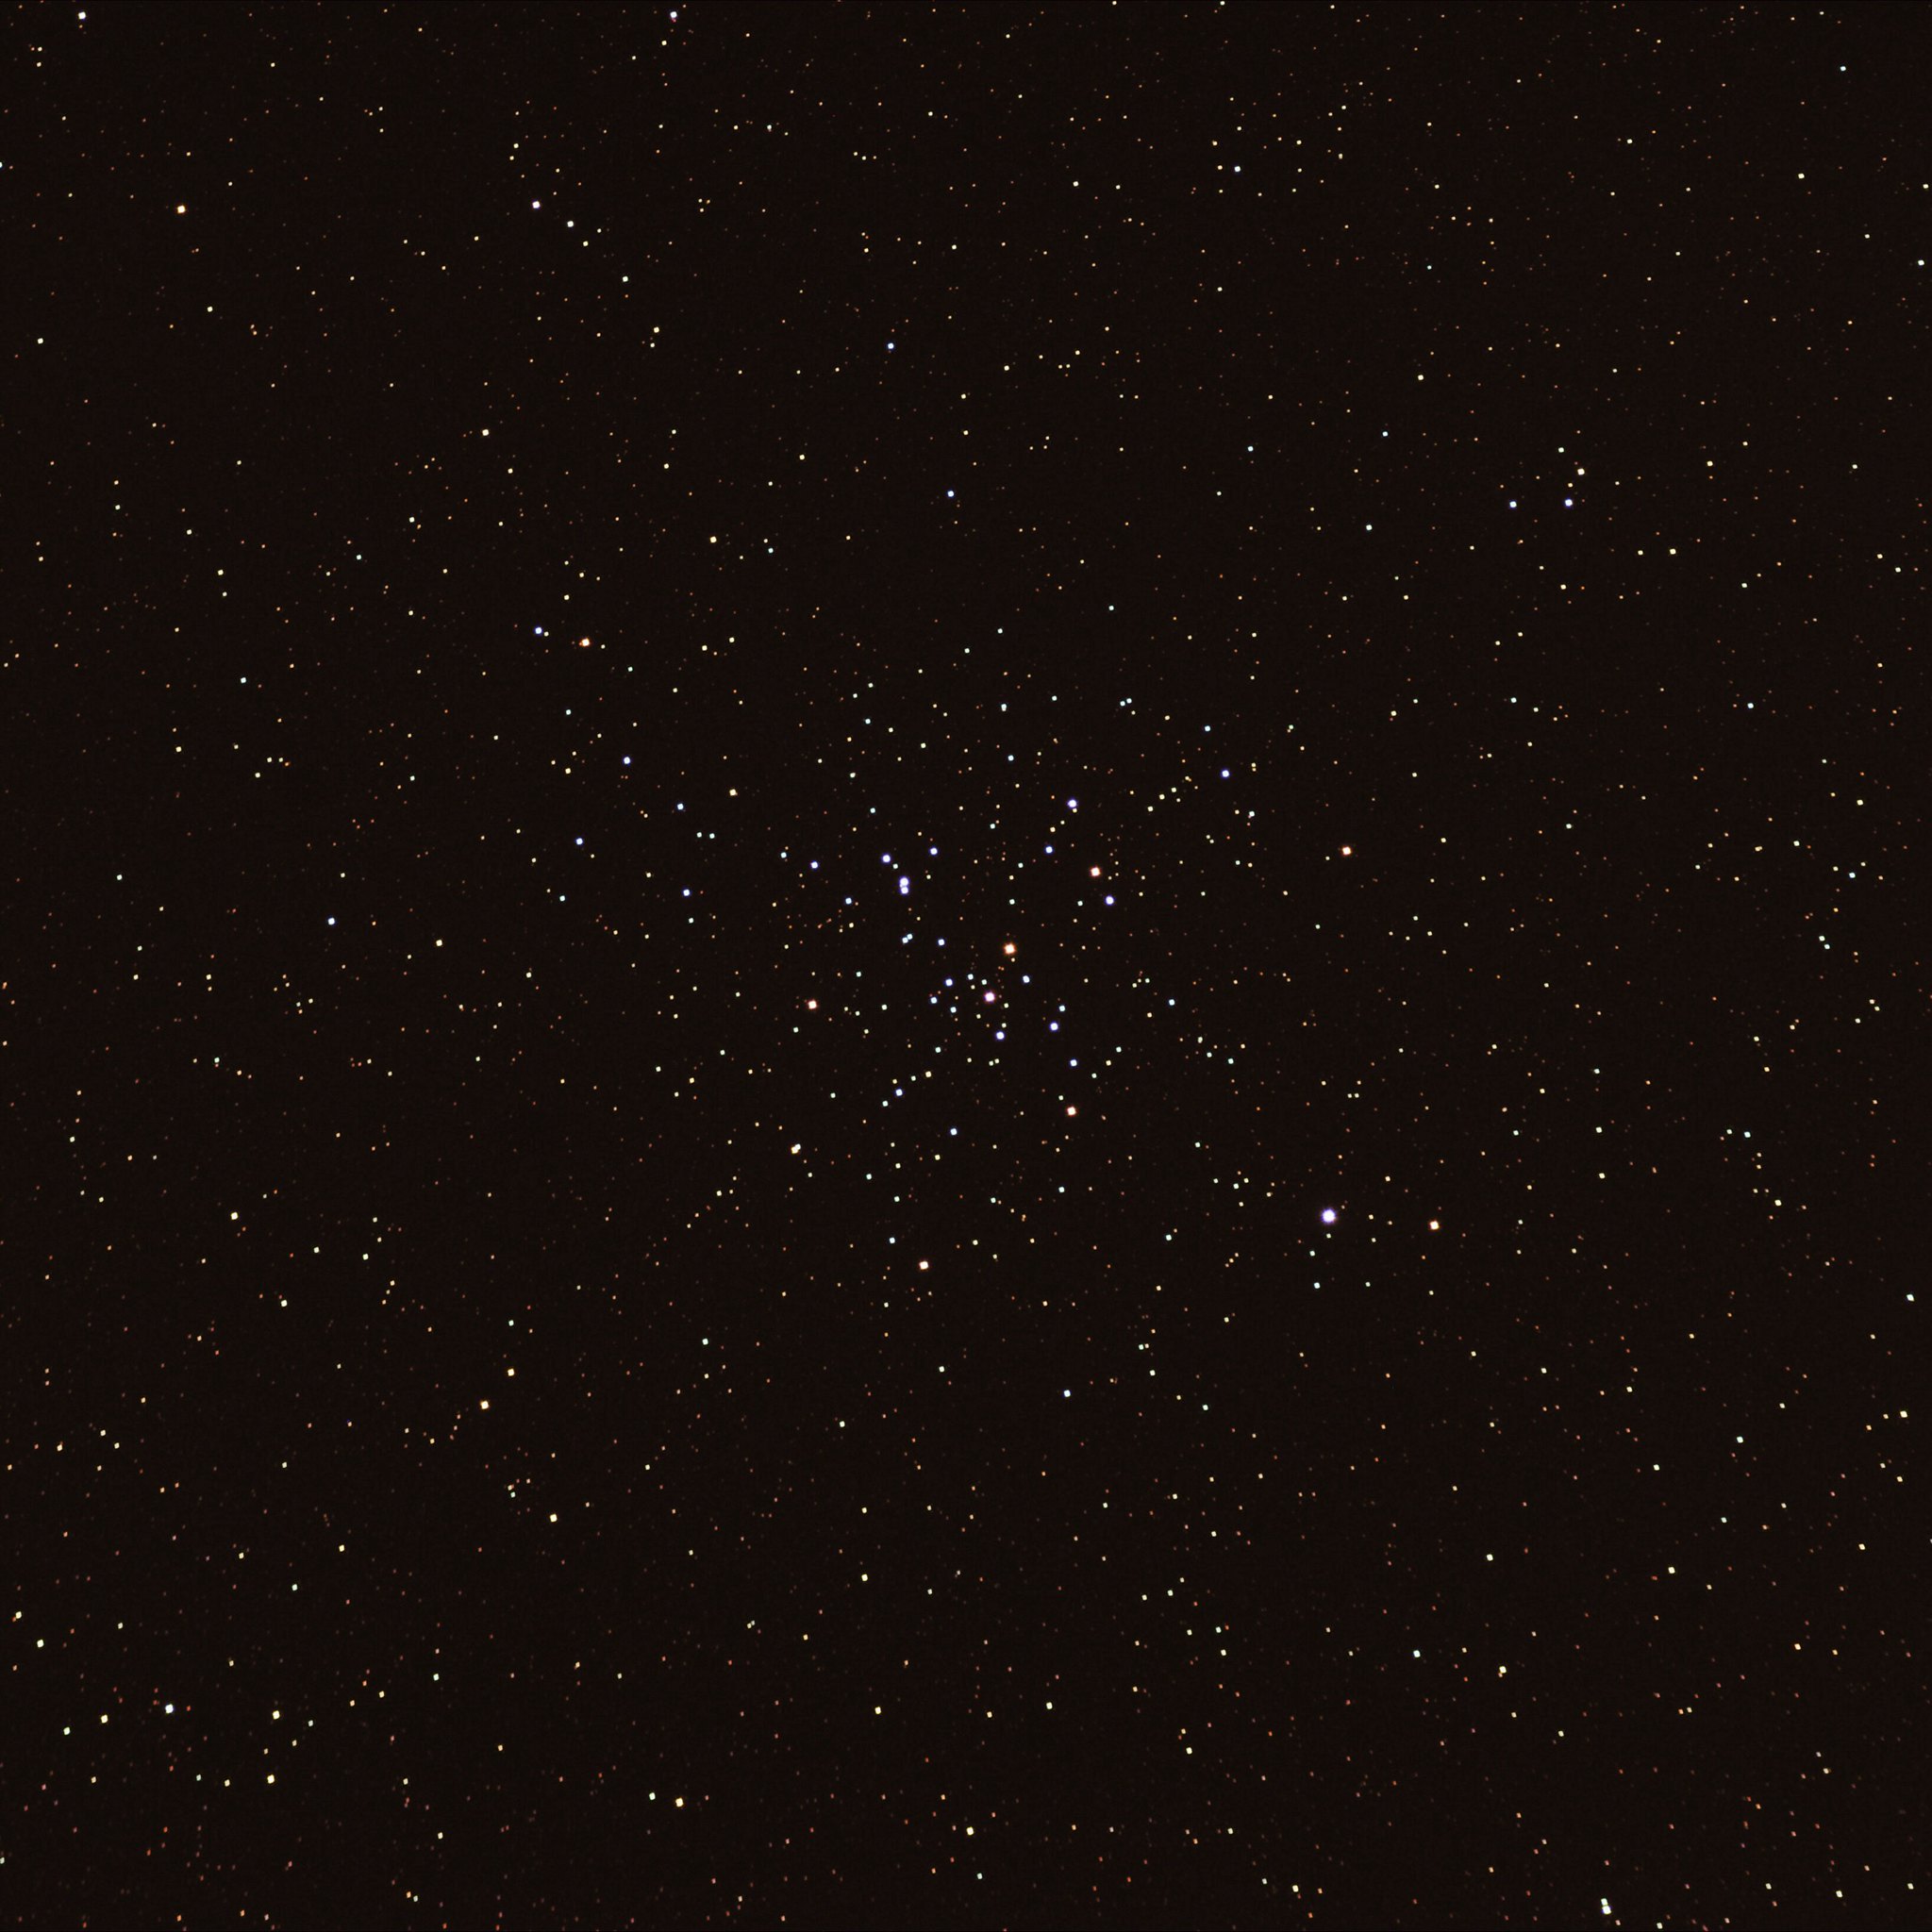
"Flat Frames" or "Flats": These frames are used to create a "Master Flat", which is a template that reveals any oddities in your CCD chip (like dust bunnies) or optical assembly ( like vignetting). You can take these frames a number of ways, including covering your lens or scope with a white shirt, shining a flashlight down it and taking a series of short exposures, to using a lightbox. Again, take these when you are out in the field or in your observatory so they are taken at the same temperature, same focus setting, same ISO setting etc. You use your stacking software to create the Master Flat, and then the stacking software subtracts this image from your complete set of stacked images to remove the sorts of imperfections mentioned here.

Example:


Depending on the software you use (I use Deep Sky Stacker preferably, but from what I can see, Registax and MaximDL handle these as well so I guess this is the norm for astronomical processing) you then specify which is which (point the software towards your series of light frames, dark frames and flat frames accordingly) and let it do the rest, of course leaving it up to you to perform any kind of post-procesisng you want to (sharpening, curve adjustment etc.)


Got all that? Seems logical. Seems easy enough. Again, I just learned this during my lunch hour at work and am simply regurgutating it here on the blog to help me internalize it. I am by no means an expert. I am barely even an amateur (per the silly attempt at M31 above!) but hopefully this information makes sense and is helpful to somebody.

Next time I go out I need to be really careful to take all of this into consideration and simply take the time to do it all, which will hopefully result in a better image.

Wednesday, October 22, 2008

Going Wide Field

So I have had a little bit of fun with taking a few photos through the LX200 with the Nikon D40. The results have been fine, not brilliant but just fine. Tracking objects now seems to be the biggest issue: getting that perfect polar alignment is a bit of a hassle to do every time I set up!

But, I am going to take a couple of steps back. I purchased a mount that enables me to piggyback my D40 atop my LX200. I am going to use this configuration for some wide-field attempts. Going this route should be a little more forgiving in terms of getting a precise polar alignment, methinks.


My first attempt will be with M31, the galaxy in Andromeda, hopefully as early as tomorrow night. If I shoot it using a 200mm telephoto and aim for around 30-40 minutes of data, that might get me a decent result. Also on my target list are the Pleiades cluster, the Cygnus constellation (real wide field!!!) and maybe the Horsehead Nebula when it pops up over the horizon later next month.

Saturday, June 28, 2008

M8 Lagoon Nebula

Having a late night...

These two images were shot last night. This is my first attempt at a reflection nebula. The Lagoon is in the Sagittarius region, and is a brilliant area to observe naked eye. I managed to capture some nice color here. Still, post-processing it tough going.

Details:
7*25 second exposures
ISO 800
Deep Sky Stacker
Run through Noiseware

click on images for full size

Saturday, May 24, 2008

Nikon D40

So, today I purchased a Nikon D40 Digital SLR! It's a big move for me. I've been relying on point-and-shoots and modified webcams but now, hopefully, I can take a deeper plunge into astrophotography with this camera.

I got a pretty good deal on the basic kit (camera body and 18-55mm zoom lens) and also got a deal on a 55-200mm zoom, kitbag, instructional DVD and other goodies. I experimented with it tonight on a few different subjects (kids and pets, basically) and the results were brilliant. Very vibrant color, excellent depth of field, and a very easy, intuitive menu system (with quite a large screen to use as well!) make this camera a very nice system indeed. Tomorrow morning I'm going to wander around downtown Austin and take a few shots there as well.

It will probably take me a while to learn how to use it. I used to own a 35mm SLR way back when, and while it feels very nice to have an SLR-type camera again, I have a steep learning curve ahead with respect to using it for astrophotography. I may well start with wide field shots (piggy-mounted to the LX200) before attempting deep sky stuff.

! Be sure to check out my blog to see my Nikon D40 astro shots here!