I often get asked about how start out shooting stars with basic equipment, like the modern DLSR camera body and an 18-55mm stock lens. I get asked either through FLICKR or via my blog site. I thought I'd post my basic response below. If anyone has any amendments or recommendations, I'd love to hear them!
Here is what I recommend to start off with – photos of various star regions and star trail shots. Both are pretty easily attainable and can get quick results with a little bit of care and patience. Admittedly, a lot of this is written with the Nikon D7000 camera in mind, which is what I use. Many modern DLSRs should have comparable features, though.
First, though, some general pointers!
- Make sure you have a decent tripod. The D7000 is somewhat heavy, so you want to be sure you have a tripod that can support it safely for long periods of time and be able to position the camera smoothly and easily without moving out of position later on. Just make sure that you can support your camera safely for long periods of time without the chance of slow slippage out of position.
- Get an infrared remote control. If you don’t already have one, you can get one off eBay for pretty cheap (Grey market units for US$5.00! for Nikon and Canon compatible remotes)
- Get familiar with the stars. To know where to shoot, you need to have a good understanding of the stars. You can use a basic planisphere available at many bookstores. Or you can download some free star map software (try Stellarium, it’s excellent!). If you have a smart phone like an Android or iPhone, there are some star map applications that you can use, too. If you know where interesting things are in the sky, you can aim your camera at them and try to capture them.
- Focusing. The D7000’s Live View mode is excellent for shooting stars. Many other DLSR camera models have this feature. Use manual focus mode, it gives you more control and you won't be cursing at the camera when it doesn't focus by itself. When you have set up your shot, turn on live view mode and zoom in as far as possible (on the camera, using the + button). Then focus the camera until the star is sharp. Turn off live view and proceed with shooting. If there are no bright stars in the area, find a bright star close to that area and use it, then point the camera back to where you want to shoot without knocking the lens out of focus.
- Comfort. When shooting, be sure you’re comfortable. It’s hard to concentrate when you’re too warm or too cold, hungry, thirsty etc. so prepare accordingly.
- Light Pollution. Try and get far away from city lights if it’s safe to do so. Pick out a spot that you’re familiar with or have access to before you go and shoot so that you’re not driving around in the dark getting lost instead of taking pictures! Or, try and find a SAFE spot that has you shooting at your desired target away from city light domes.
- Charge Batteries! Nothing worse than starting to shoot when your batteries die. Batteries may die faster in colder weather! Make sure they’re fully charged before you head out.
- Safety. I always stress this. Shoot somewhere safe. Tell someone where you'll be, or take someone along. Check in periodically if you're out for long periods of time.
Hopefully this makes sense. Some of it sounds basic but people can underestimate what it requires to shoot the stars. Now onto setting up and taking shots…
A. Star Regions.
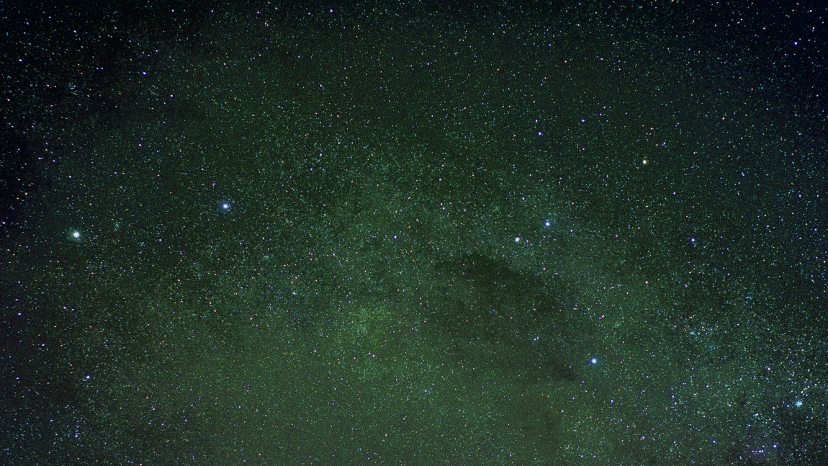
Your set up should enable you to capture some cool shots of various star regions. One very good place to shoot is the center of our Milky Way galaxy. This is located in the Sagittarius region, which is just next to the tail of Scorpio. There is a lot of stellar dust, star clusters and smaller nebulas here which can show up nicely if the shot is done well.
To take this shot:
- Set up camera at 18mm
- Set camera to Manual focus mode
- Set your focus. Turn on Live View, aim camera at a nearby bright star (try Antares, the red-colored star in Scorpius because it's nice and bright). When Antares is in view and centered on the live display, zoom in as far as you can go. Focus until the star is as sharp as possible.
- Now, aim towards the center of the galaxy. This is located just next to the tail of Scorpius or right at the Sagitarrius region. (use your planisphere or free software to confirm!) Make sure the camera is locked into position and your shot is nicely framed.
- Set camera to RAW shooting mode (to get more color and data)
- Set aperture to F4
- Set Exposure to 800 ISO, or 1600 ISO if you’re in really dark skies
- Set shutter speed to 30 seconds.
- Take a shot
- Review the shot. Look good? Got stars? Any color? Too bright? Make adjustments to ISO and aperture and keep shooting until you get the shot you want. It's nice to get some star color and some hints of Milky Way dust lanes in there.
- Feel free to take several shots of the same region so that you can stack them later to have a relatively noise-free image (see bottom of this write-up!)
Use this method for any region in the sky. Experiment! There are some neat regions up there and you can try capturing entire constellations at a time.
B. Star Trails.
These shots are cool but take a while! You’re capturing the apparent movement of stars across the sky as the Earth spins on its axis. We’re going to cheat a bit here and use software to help with the shot.
- Set the camera up at 18mm
- Aim towards desired section of the sky. Try the south or north polar regions (depending on your location) so that you can capture some nice tight circles. You can also try composing the shot so that you can make it more interesting. For example, try and shoot with a big old tree or old building in the foreground.
- Focus using live view. For star trail shots, some things being slightly out of focus gives you thicker star trails which can be more pleasing to view.
- Set ISO to 400 for initial test.
- Set aperture to lowest possible value, say F4
- Set shutter speed to BULB
- Take a two minute test shot.
- Review the shot. Look good? Shot composed okay? Too dark? Too light? Make adjustments, take test shots until satisfied.
- When you have set up your shot, now go ahead and take about 1.5 hrs worth of two-minute exposures. Make sure that there is not a time gap between taking the exposures. Take one right after the other. 1.5 hrs is a good starting point.
- Then, go home and download some free software called “Startrails.exe”. This software will put all of your two-minute exposures together into a final photo, which should show the full 1.5 hours of star trails you would have captured!! You'll need to copy your two-minutes exposures into a special folder or directory on your PC, and point the Startrails software to that folder/directory. The software will collate and stack all of the images and create a final star trails shot!

Processing the images also takes some time. For the star regions shots where you have taken multiple exposures of the same region (in order to minimize noise in your shot) you must stack the individual shots into a final clean image. Download Deep Sky Stacker for free and point the software towards a directory or folder with your star region RAW shots, then let it stack the images to create a final image. With the star trail shots, you're using the aforementioned Startrails software to compile the image for you. You can make any star image look better with a bit of tweaking. You can use either Photoshop ($$$) or GIMP (free). I use GIMP. Things you can adjust to get better colors and appearance are: Levels, Curves, Saturation, Sharpening. Try it out!
2 comments:
Phil,
I appreciate the simple, clean, and straightforward advice! I am getting into the astrophotography field, and am a first time DSLR user! I appreciate the actual settings you talk about, and how you don't wax on and on with technical terms, or condescendingly "suggest" people read the owner's manual. Much appreciated!
Cheers From Dallas, TX,
JP
Hi Jose,
Very sorry for the late response!
Glad you liked the post and hope you found it useful.
Clear skies!
Phil
Post a Comment