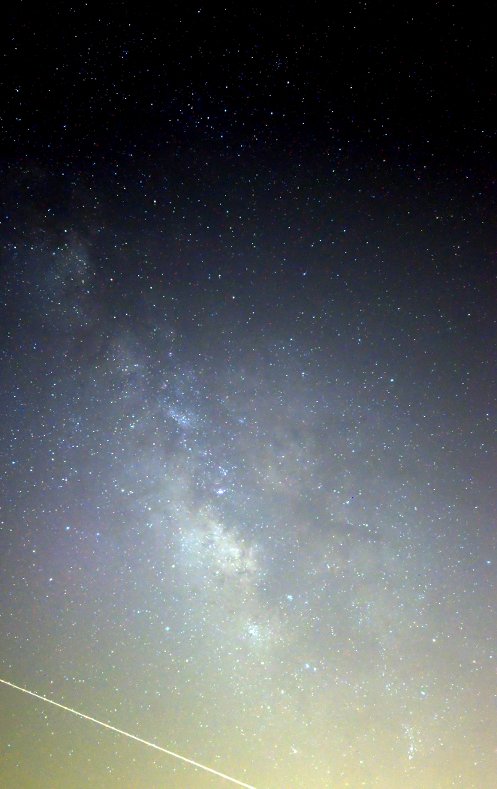
Inspired by other contacts here on FLICKR, I set up my rig for wide field shooting. I haven't done it before. Anyway, this is a test shot of the center of our galaxy, the Milky Way. Way too much light pollution but I was just testing my rig, using a machined part that Dad made me to attach my camera to the counterweight arm of my Celestron CGEM mount.
Image Details:
- Nikon D7000
- Sigma 10-20mm HSM (set to 20mm)
- ISO800
- 3 Minute Exposure
2 comments:
Hi there!
I've just got myself a D7000, and I'm waiting (and waiting) for a break in the clouds to try to get a shot like this. I tried it on my D40 a few weeks back, but I was so dissapointed with the colours. I've managed to get some decent shots apart from the colour! I'm wondering what picture control (if any) you have. I tried setting it to vivid+ etc, using the Kit lens from the D40 (18-55mm).
Any help would be greatly appreciated!!
Cheers,
Olly
(PS here is a link to the milky way shot I got so you can see what I mean about the colouration: http://rstcphoto.blogspot.com/2011/09/fish-eye-milky-way.html)
Hi Olly,
Thanks for dropping a line. Congrats on the D7000 purchase! It's an awesome camera with so many capabilities. You'll love it.
From a camera settings perspective, I shoot manual, with picture quality set to normal. I set ISO to 800 (fairly high given that I was near light pollution, but it still worked out) and aperture open as wide as possible to F4.
Now then, this shot was taken with my D7000 mounted to my GOTO Equatorial mount (CGEM). I left the shutter open for 3 minutes.
If you don't have a motor driven telescope or camera mount, then you won't get an image with sharp stars if you just shoot for a 3 minute exposure, as you'll get star trails instead.
I would start out with a high ISO (start with either 640 or 800), and shoot for a minute. Shoot in RAW mode. Make sure you are in focus (use LIVE VIEW - center a bright star, turn on live view, zoom in digitally using the + button on the back of the camera, then focus until you get a sharp image). Then take some shots. Experiment, start with 30 seconds, then go for a minute.
A key thing will be processing. Copy the RAW image to GIMP or Photoshop or whatever you use, then try experiment with CURVES and SATURATION. You can push the latter up to, say +20 in GIMP and get some interesting color. Anything past that and it looks a bit fake and too severe.
Good luck, and let me know if you need more info.
Cheers,
Phil
Post a Comment